Skip to content

grep: Argument list too long

A quick one.
Today I tried grepping for some stuff in a large Maildir and received the aforementioned error.
A nice workaround is to use:
grep -r "blah blah" /path/to/dir
instead of
grep "blah blah" /path/to/dir/*


HTH!

The file /boot/grub/stage1 not read correctly

Today I virtualised a server into a similarly spec'ed and partitioned VM.
After I have copied over the contents and rebuilt the initrd, I then tried to run grub-install only to get this in return:
The file /boot/grub/stage1 not read correctly
It turns out grub failed to install due to differences in the ext4 filesystem (either inode size, features and so on); on the origin server it was ext4 with CentOS 6 defaults, while the VM's was prepared from a CentOS 7 LiveCD. `tune2fs -l` should be able to show all this info.

The solution was to re-format the VM partitions from a CentOS 6 CD, after which I had no more problems.

HTH

A week with Wileyfox Swift

Recently I have been looking for a new phone to replace the old Motorola XT910 which had begun to test my nerves.
In the end I have decided it's not worth spending several hundreds ££ on a "flagship" device that will probably get replaced in 2 years time, I also am not a fan of contracts, so it had to be a sim-free device.
I had a look at the sim-free devices available and I have ended up with 2 reasonable choices:
- Motorola Moto G
- Wileyfox Swift
The set of features I was looking for was:
- open (unlocked) bootloader so I can fiddle with it (I'm a fiddler :> )
- 5" or smaller (hard to find non-enormous devices any more)
- CHEAP (I'm also cheap :> )
- reasonable quality

After navigating around for info, reviews and so on I have chosen Wileyfox Swift, especially because of pricing and specs.

Motorola Moto G 3rd Gen 1GB RAM, 8GB disk is ~£150.
Wileyfox Swift 2GB RAM, 16 GB disk is ~£120. The same spec'ed Moto G is around £200, quite the difference!


The Wileyfox was swiftly dispatched by Amazon and I got to play with it just a couple of days after placing the order.

First impressions were really good. This is a nifty, little machine. Plastiky, but solid and quite slim!
The display doesn't look ginormous and is very crisp and bright.
Booting up to and general use of CyanogenOS 12.1 was a pleasure and it felt like a breath of fresh air coming from the old and locked-down Motorola XT910 - good bye bloatware!
I love the new Privacy Guard feature in Android and the fact that I can now have fine grained control over what applications can do and access.
I am also happy about the availability of Truecaller anti-spam functionality, though I have not started to use it yet.


Things I like, not necesarilly about the hardware, but on the whole:
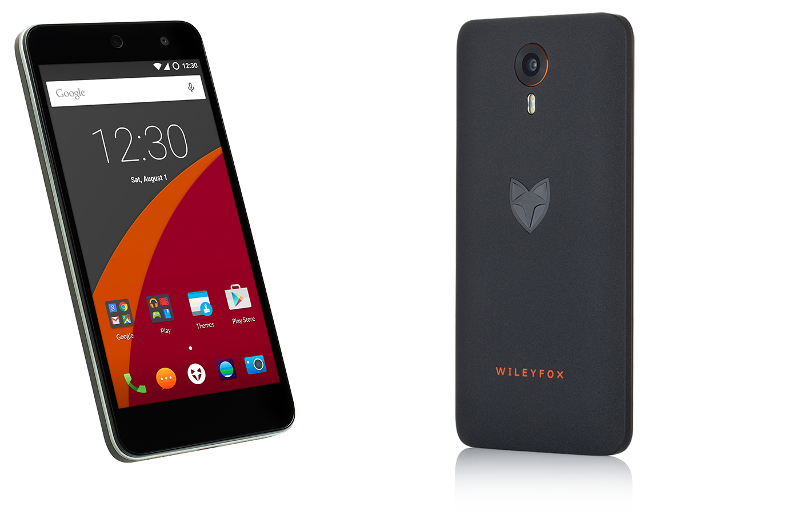
- dual micro-sim - never again shall I buy a single-sim device!
- decent battery life, it gets me through the day easily and charges fast 
(still a long way from the 3200mAh of the XT910)
- good build quality, considering the price
- crisp and bright display
- pretty fast, I'm yet to experience any lag - though I don't use any heavy apps such as games
- good control of the apps via Privacy Guard, really Android should have had this from the beginning
- default OS is nice and clean, without the usual crapware and some great additions
- easily hackable, trivial to play with the ROMs etc - great for developers and techies!
- holding the back button pressed for slightly longer kills the current app. How I craved for something like this!


And some things I don't like:
- the camera - it's the biggest let-down of this device, 13MP and 5 lens, but it's mediocre at best,
can be enough for some quick snaps for Twitter etc, but nowhere near the quality of the e.g. Galaxy S4 one
and in many cases worse than the camera in my old 2011 Motorola XT910.
For a while I thought there is some sort of film covering the lens, alas not, it's just crappy. :)

- the dual SIM experience is OK-ish, but surprisingly less so than the Nokia Asha 503, not as much control,
I hope future Android releases will improve this

And a few issues...
My first actions were to secure the phone, i.e. setting a PIN and also enabling scrambling of the input layout; next was encrypting the phone. These 2 should be done by everyone, alas few care - or understand enough to care about the security. Manufacturers should put more effort in this.

Moving on, I hit a problem, because that's what happens when you fiddle. :)
While still at an experimental stage of using this phone, I wanted to go back to an unecrypted state ... and to my surprise I noticed it's not really possible anymore. Perhaps there is some shell thingy that can be done to disable it, but it's certainly missing from the UI and I hadn't enough time to fiddle any more with it that day.
I went straight for a re-flash of the CyanogenOS which is available at https://cyngn.com/support; this wiped out the encryption (along with my data).
This is very easy to do, takes 5 minutes. Start with putting your phone in fastboot mode then install android-tools (Android SDK) on your computer so you have "fastboot" and "adb" utils available.
wget http://builds.cyngn.com/factory/crackling/cm-12.1-YOG4PAS1T1-crackling-signed-fastboot.zip
unzip cm-12.1-YOG4PAS1T1-crackling-signed-fastboot.zip
sudo fastboot -i 0x2970 flash boot boot.img
sudo fastboot -i 0x2970 flash system system.img 
sudo fastboot -i 0x2970 flash recovery recovery.img
sudo fastboot -i 0x2970 reboot
Problem solved!

Flashing the OS via Fastboot created another problem though, it had not left enough free space on the data partition to allow for the disk encryption to be enabled.
This meant I had to do it manually, seemingly a simple operation, but which will also wipes your data - good thing I messed around with this phone before putting in "production":
- reboot in recovery mode (adb reboot recovery)
- get a shell (adb shell)
- check /proc/partitions and /proc/mounts for your "data" partition and resize the filsystem on it to use 32Mb less space 
(just substract 32768 from the number shown in /proc/partitions), this WILL WIPE YOUR DATA. e.g.
~# mke2fs -T ext4 -L data /dev/block/mmcblk0p31 12951023
- reboot and you're done, once the phone is up and running you can encrypt it again!

Besides encryption, I also recommend installing a firewall application, I have found AFWall+ to be excellent, it's both in Google Play and F-Droid. If you like to stay in control of your device, this frontend to iptables surely helps.

I have also disabled Gmail, Google calendars and pretty much everything Google I could except Play; I'm currently sync'ing my contacts, calendars, tasks and notes from a local installation of Owncloud.
This has been a surprisingly pleasant experience and warrants another blog post in the near future.

Conclusion
The Wileyfox Swift has been so far a very nice experience, more than worth the £120 I paid and I recommend it to anyone who wants a "no bullshit" smartphone experience.
Watch out for the camera, if you like to take beautiful pics, this will probably let you down. Having said that, it's not totally worthless and is fine for a quick snap.

No whois server is known for this kind of object

I make extensive use of whois in my work and since they introduced all these fancy TLDs in recent years I've noticed the standard linux whois client is failing for many of them.
Ever tried to whois e.g. whois.fail and got this instead?
No whois server is known for this kind of object

Well, apparently it's as simple as adding the new servers to the whois client config file. Here's how my /etc/whois.conf looks like.
Feel free to copy/paste.

Credits go to thde.io.

Cheerio!

Protect KVM processes from OOM killer

While running clouds on Linux KVM hypervisors it may happen that some of your virtual machines processes get killed by the OOM killer in order to free up memory.

Depending on your situation, the OOM killer may be instructed not to kill certain processes; but if you go this way make sure you know what you are doing and how resources are used.

So, to proceed with protecting KVM processes from out of memory scenarios, we need to run a few commands:
1 - determine the PID of the processes, we can use pgrep for this
2 - protect them from OOM killer by changing the PIDs oom_adj value to -17 (OOM_DISABLE); if you use a 3.x+ kernel then you need to change oom_score_adj to -1000 instead as oom_adj is deprecated

This can be wrapped up in a one-liner such as this:
for PID in $(pgrep qemu-kvm); do echo -17 > /proc/$PID/oom_adj; done

That would work in CentOS 6, but if you are on a newer kernel than that (say 3.x like the one in CentOS 7) then use this:
for PID in $(pgrep qemu-kvm); do echo -1000 > /proc/$PID/oom_score_adj; done

You might want to double check your KVM processes run as qemu-kvm, that's the program's name in CentOS, it may differ in other distributions.

If you do not want to do this manually every time a VM is created you can simply create a cron job to do it for you every X minutes; if you spin up instances very often then you may set it as frequent as 1 minute:
echo '*/1 * * * * root for PID in $(pgrep qemu-kvm); do echo -1000 > /proc/$PID/oom_score_adj; done' > /etc/cron.d/oomprotect

If you run into memory usage issues, do have a look at KSM as it can help optimise memory utilisation (but at the cost of extra CPU usage).

Wasting time

Quit twitter. Now if I could only do the same with reddit and hacker news.. I might have a shot at doing something with my life. :)
Later edit 7th May: well, that didn't last long, I reactivated my twitter account. But HN and Reddit remain banned. So, partial victory.

Setting up Varnish in a CentOS server

I've seen Varnish

Varnish is one of those small, shiny, remarcable jewels of the open source world.
It can make an enormous difference in how your web application responds and how fast your web site loads.
It's all in it's caching feature and not only; I've seen people use it as an web application firewall (search github) and out of the box it will only forward well formed HTTP requests to your backend, acting as a filter against malicious activity or scans against your server.
It'll also take the brunt of a syn flood attack, sparing Apache HTTPD or Nginx which usually go belly up quite fast.


Performing an install of Varnish in CentOS 6 is quite trivial as they provide a yum repo:
yum -y install https://repo.varnish-cache.org/redhat/varnish-3.0.el6.rpm
yum install varnish
Out of the box it will listen on port 6081 and will not do much caching. If you want to modify how it works you need to edit 2 files:
/etc/sysconfig/varnish
/etc/varnish/default.vcl
The first file tells Varnish what kind of cache to use and how big, also on which ports to listen to.
The second file configures the backend servers and the way in which the caching is done. Configuring caching in Varnish is not for the faint of heart, so do a serious read-up of the documentation before-hand; there are also many examples online.

Both those files come with working defaults, all you need to do is point your web traffic at it and here you have 2 choices at least:
1 - Assuming Varnish sits on the same IP/machine as the backend, change the port of your web server to something other than 80 (like 8080) and set Varnish to use port 80
2 - Do a redirect from iptables, this is my favourite as it doesn't need any reconfiguration of the web servers:
iptables -t nat -I PREROUTING -i lo -j ACCEPT 
iptables -t nat -I PREROUTING -s LOCAL_IP -p tcp -m tcp --dport 80 -j ACCEPT
iptables -t nat -I PREROUTING -p tcp -m tcp --dport 80 -j REDIRECT --to-ports 6081 

Before you do that, however, you need to tell Varnish which is the backend web server. This is done in /etc/varnish/default.vcl like this:
backend default {
  .host = "LOCAL_IP";
  .port = "80";
}

* LOCAL_IP is your servers IP
You can check the configuration is correct with this command: varnishd -C -f /etc/varnish/default.vcl
Restart Varnish so it's up and running with your configuration: service varnish restart
You can use the commands varnishtop or varnishstat to see what is going on.
Once you do this HTTP traffic will go through Varnish and then to your backend, one consequence of this is that your Apache log will show that all requests are coming from the local IP instead of your visitors' IPs. You can solve that by installing and configuring mod_rpaf.


Enjoy!

Bypassing BT HomeHub

So you have BT Infinity, the white Openreach modem is up and running and you have broadband via wired or wifi through the fancy BT HomeHub; but you are a geek or a freak and you want to run your own router.
You want to use your local linux box, custom dd-wrt router or who knows, perhaps a Raspberry PI. Fair enough. Here's how to do it:
1 - disconnect the BT HomeHub router from the white modem
2 - connect your linux machine to the modem (LAN1 port usually)
3 - run pppoe-setup on the linux machine and answer the questions accordingly. Interestingly the user/password I used seem to be sort of gibberish, but do work: "Internet@btbroadband.com" and the password "broadband".
I chose not to let pppoe-setup set the DNS or firewall for me, ymmv. Start the connection with /sbin/ifup ppp0.

That's it, enjoy your broadband!

Links: https://community.bt.com/t5/BT-Infinity-Speed-Connection/Openreach-How-I-can-connect-my-PC-directly-into-Openreach-white/td-p/716632

"Fixing" Firefox

For quite some time now Firefox has a shitty behaviour regarding the address bar, which may be OK for grandma, but it gets in the way of power users.
I was too lazy to do anything about it until now, but it's 2015, I am getting old and less tolerant, so here are my pet peeves:
A - modify urls that do not look like traditional addresses and add a www prefix and .com suffix
B - send a single word address to a google search instead of opening it (kills internal addresses such as "http://wiki")
C - the protocol gets hidden, but when you copy/paste the url from the address bar it gets included, e.g. I copy "www.nux.ro", but when I paste it in an editor it actually comes up as "http://www.nux.ro"


So here's how to fix it - open a new tab, go to "about:config" and:
- to fix A search for "browser.fixup.alternate.enabled" and double click it so the value changes to "false"
- to fix B search for "keyword.enabled" and double click it so the value changes to "false"
- to fic C search for "browser.urlbar.trimURLs" and double click it so the value changes to "false"


That's it. Now you can enjoy a better browsing experience! ;-)

Changing an AD password from CentOS Linux

Changing the AD password from linux is surprisingly straighforward.
Just run the passwd command as you would normally!
If that doesn't do it, then just issue this command, replacing of course the variables with your own values:
smbpasswd -r $AD-server -U $AD-username

Voilà, enjoy!